How to repair or avoid simple modeling mistakes
Simple modeling mistakes happen to all of us. Most can be repaired. Even more can be avoided (more on that later). It’s been said (tongue-in-cheek) that award-winning modelers don’t make fewer mistakes than others, they just know how to cover them up better.
So let’s fix some common mistakes.
How do I unglue a part?
If you use Tamiya’s thin liquid glue (and if not, why not?), just dip a Q-tip into turpenoid and spread it on the parts (Figure 1). Wait a bit. It should loosen up (Figure 2).
Remember to be careful near cemented joints when you use a turpenoid-based wash.
How do I get decals off tape?
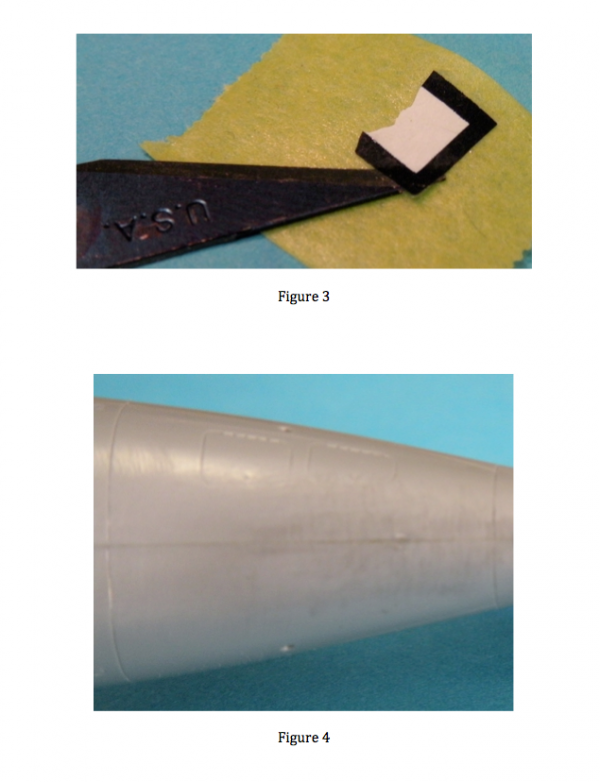
We’ve all had tape pull up part of a decal accidently (even after top coating). I get my decal bowl – fill with water and microwave on high for about 15 seconds. The water should be hot, not boiling. Drop in the tape/decal and wait a bit. After a few minutes, after the water cools, take out the tape and you should be able to slowly scrape off the decal using a sharp knife (Figure 3). Be patient. I’ve used this technique successfully with Tamiya and Blue tape. After you scrape it off, put back in place with Micro Sol.
How do I check my seam repairs?
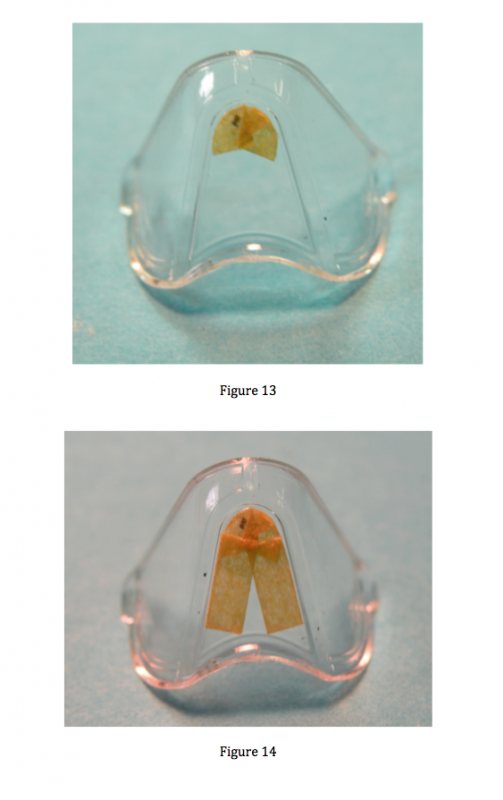
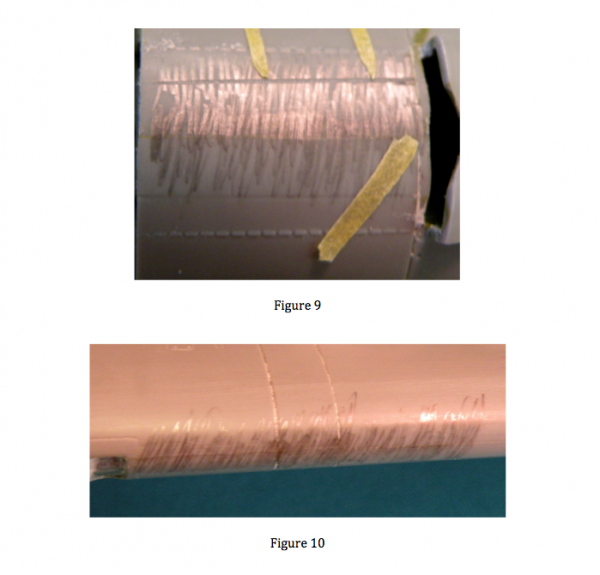
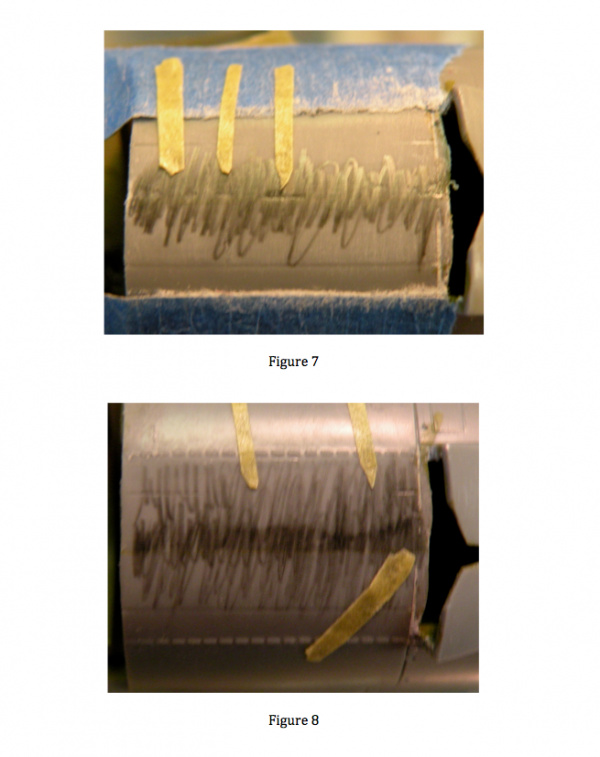
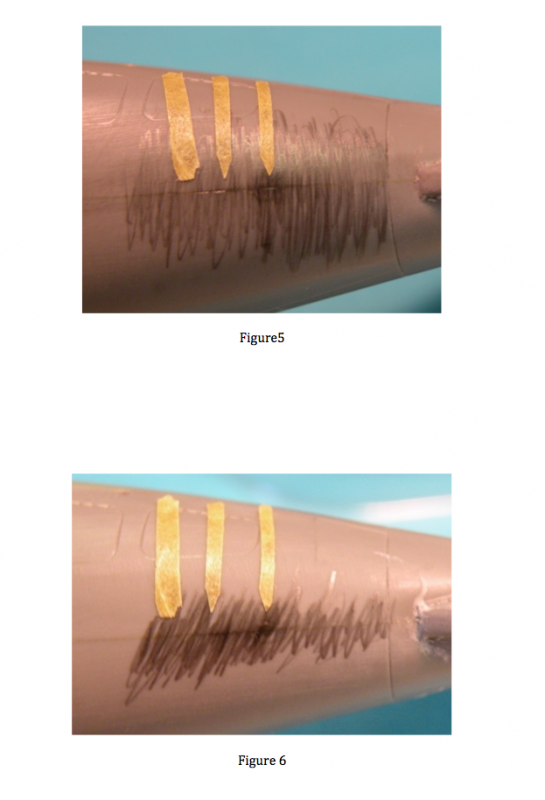
I’ve seen many techniques, but I think this is the easiest. Look at this seam I sanded, super glued, and re-sanded (Figure 4). Is this a good seam? Let’s check by simply using a pencil. Rub the side of the pencil over the seam, rotate the seam and it will become quite clear if it’s flawed (Figure 5.) If it is, (the pieces of tape show the flaws) use super glue right over the scratches, wait, then sand. Then try the pencil again (Figure 6).
It also works for the reverse – did I sand off a panel line that should be there? Figure 7 shows the incomplete seam, and Figure 8 shows the repaired seam, but also where panel lines need to be restored. Figure 9 shows the completed seam and restored panel lines. The technique also works on wing leading edges (Figure 10).
How do I mask a canopy?
Here is where good modeling practice becomes controversial. I know modelers swear by using tape over the canopy and cut to mask the canopy. I think this is Russian roulette. I can’t think of anything more hazardous to a model and stressful to a modeler then combining a sharp knife, clear plastic, no duplicate parts and no “undo.” I don’t want to combine those objects in a sentence, let alone a model. One slip and it’s all spare parts. Not worth it. Use one of the masks (Eduard, True Details, E-Z Masks, Fast Frames, etc.). If they make it, I use it. They may not be perfect – sometimes I’ve had to cut the mask to make it fit, but I recommend them. If not, make your own.
First of all, I attach the windscreen and canopy (if closed) to the model. I try to use liquid glue where possible. I find sometimes white glue will give way when I pull off the masks. I hear you say it’s easier to mask it while it’s off the model, but once you have it masked, you are essentially blind when you attach it. One slip and the glue runs up the mask and you won’t see it until the model is done and you remove the mask. Talk about nasty surprises. Attach the clear part first, so you know it’s Ok. You also avoid the problem of touching the inside of the glass.
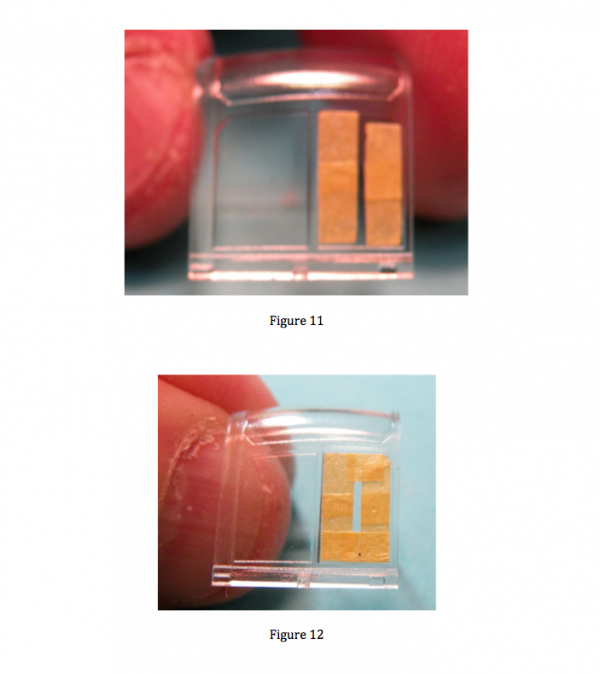
As for the masking, simply cut slices (using a new sharp blade) of the tape you prefer (Tamiya for me) and slowly, but safely, mask the glass bit by bit. I know I said attach it first – but this is for educational purposes. Don’t try to cover the whole section with one piece of tape. I don’t even cover one length with a single piece (Figure 11). I cut it and this way I can make sure it catches the line at both the top and bottom, or left and right. For the angle at the top I cut and fit little triangles (Figure 12). After the outline is done, fill in with either tape or liquid mask.
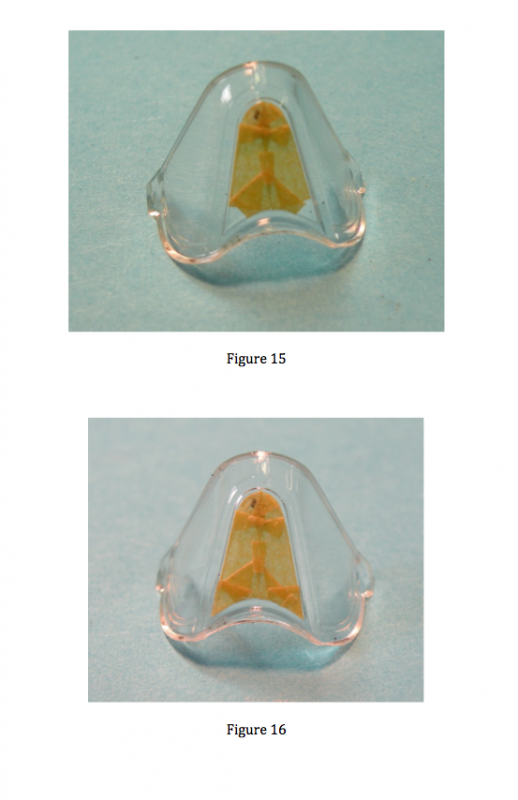
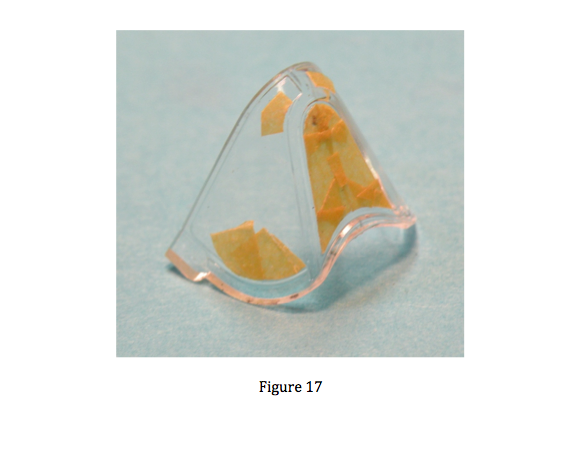
Sure you say, rectangles are easy – but what about curved sections? For the curved sections, I use a circle cutter or a punch and cut into arcs. Fit the arcs to the surface (Figure 13). Then add straight sections as before (Figure 14). At the bottom – use reverse arcs from the circles you cut before (Figure 15). Then fill in with triangles (Figure 16). Then move to the next panels with (in this case,) larger arcs (Figure 17). I’ve done a 1/48 fighter aircraft in under 1 hour. Bombers will take longer, but masks for those are usually available.
And as a tip – if you do need to remove paint from the glass to clean up, dip a toothpick into eyeglass cleaner before using. It helps dislodge the paint. Make sure it doesn’t contain ammonia (like some photographic lens cleaners) or your acrylic paint is gone. I also recommend it for cleaning the glass or the model to remove dust or fingerprints.
Avoiding common mistakes
The good news is many modeling mistakes are avoidable. The bad news is most are due to simple laziness. And (bad) habits are hard to change. I have found that most of my errors (of all types) in building models (mostly 1/48 WW II aircraft) are due to my being lazy. Not in a big way. In little things. And with excuses.
Does this sound familiar – “I don’t need to measure that … I know it’s … and the ruler is in another drawer” or “what color was that … I saw a reference someplace – upstairs on my computer ” or “I should paint that part first, but it’s late and I’ll just glue it and paint it later” or how about “I don’t need to mask that part, I won’t overspray it.” And my favorites – “I don’t need to change the blade, this one is sharp enough. Or that tape or color of paint is good enough.”
It’s one thing not to have the correct size drill, it’s another not to bother to use it because one almost the same size is handy. And what good is having reference books if you don’t bother to look up and write down those pesky details. You can add many such examples of your own.
I am talking about the countless small decisions that go into building any model. I have found that following good modeling practices leads to building better models. The previous examples are not really mistakes, more likely bumps in the road, but they are not good modeling practices and they do seem to lead to real mistakes. More often, they are time wasters as you go back and fix whatever is out of place because you did not “measure twice before cutting once.” And time is the key element here. We all are getting older and have a good deal of models in the closet. Simply put, the fewer errors you make, the quicker the model gets finished and the more models you get to make.
So – what’s good modeling practice and why can’t I just have fun building any way I want? So what if it takes longer? You can, but many of us want to improve our skills each time and for me, going back to fix ‘errors’ is not fun, especially if I should have known better. These are the errors I’m talking about.
Good practice to me is an overall philosophy that begins and ends with risk avoidance. Save your gambling for Las Vegas. It really applies to the Yin and Yang of modeling – “Do I paint, then glue or glue, then paint.” This decision applies to every part and I make the decision based on ease of construction of the entire model, not simply the sub-assembly and risk avoidance, not convenience.
Good practice includes the upfront focus that I want to trade money for time. One of the key realizations I’ve learned is that it’s not that I have a great deal of money, but I have more money than time. I believe any serious modeler is in the same situation. And it’s not a lot of money we’re talking about, either. I believe that cost is simply another excuse for being lazy. Why else would we use that old blade, airbrush, tape, paint, tool, etc. So start with sharp and clean tools. Spend money to save time. Start with masks for canopies. Use aftermarket when available, be it masks, guns, engines, whatever.
To avoid most problems, remember the first rule of modeling: “There is no step so simple that it can’t be screwed up, beginning a series of events that ends with the model being thrown against the wall.” Focus. Do one thing, and only one thing, at a time. Focus. Ask yourself “what am I doing now?” And answer yourself “I’m here to: (choose one) cut, sand, glue, paint, attach, wash, decal, weather, whatever” Focus.